Now that we've established a potential threat that comes with poor printing, let's get to the bottom of how you can assess printing quality during inspection BEFORE your goods ship using printing adhesion testing. QC experts have a couple of very simple ways of carrying out printing adhesion testing. Two of the more standardized and popular tests are the 3M tape test and the rub test.
The 3M Tape Test
The 3M tape test is one with which all professional quality control inspectors are familiar. To carry out the 3M tape test, all you'll need is a small strip of 3M brand 1/2 inch-wide tape and the following 3 steps:
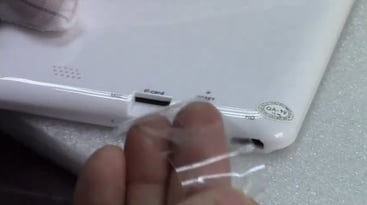
- Firmly press a strip of tape on the test surface. Generally, test surfaces can be a printed product logo, or any other surface on a product that contains printed material. Rub the tape repeatedly until all air trapped underneath is removed.
- With one rapid motion, pull the tape perpendicularly away from the test surface to remove it completely.
- Look closely at the tape and visually examine it for any signs of lifted print from the test surface. Check the testing surface for evidence of lifted material or print as well. If there is material on the tape or damage to the printed area of the testing surface, this item fails the 3M tape test.
The Dry Rub & Alcohol Rub Test
Also common procedures among printing adhesion testing are the dry rub and alcohol rub test. These tests, usually conducted together, involve the use of a white cotton cloth, either isopropyl alcohol or ethyl alcohol - commonly referred to as rubbing alcohol - and the following steps:
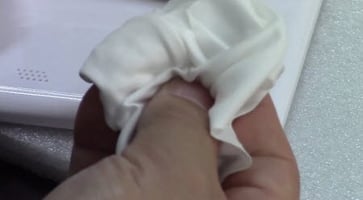
- First press the dry white cloth firmly against the printed testing surface and rub back and forth 24 times. For the alcohol rub test, lightly dampen the cloth before similarly rubbing the test surface.
- Lift the cloth from the testing surface and visually examine it for signs of lifted print from the test surface. Verify that the quality of print on the testing surface remained unchanged following the test. If there is evidence of damage to the printed area, such as faded, removed or smudged printing, this item fails the rub test.
Remember to follow these procedures for printing adhesion testing and verify the quality of printing for any logos, barcodes or labels on your product. Don't let a quality control fumble as simple as poor printing compromise your next order!